This article is extension of my previous article about DayDream: What exactly DayDream feature is about?. Now i assume you understood about DayDream, so now i am proceeding further for developing a small example of DayDream.
Step 1: Create a sample project to build this demo example
I have created a simple project to give this demo, you can follow below steps to create DayDream for your Android application.
Step 2: Create a class and extends DreamService
FYI, DreamService is added in API Level 17 and you can it extend to create custom DayDream. LifeCycle of the DreamService is as follows:
| onAttachedToWindow() | Use this for initial setup, such as calling setContentView(). |
| onDreamingStarted() | Your dream has started, so you should begin animations or other behaviors here. |
| onDreamingStopped() | Use this to stop the things you started in onDreamingStarted(). |
| onDetachedFromWindow() | Use this to dismantle resources your dream set up. For example, detach from handlers and listeners. |
Here in this example i have just included TextView to display Hello World message, instead you can create your own XML layout and set it through setContentView() method inside onAttachedWindow() method.
package com.technotalkative.daydreamexample;

import android.graphics.Color;
import android.service.dreams.DreamService;
import android.widget.TextView;

public class MyDreamService extends DreamService {
    @Override
   public void onAttachedToWindow() {
       super.onAttachedToWindow();

       // Allow user touch
       setInteractive(true);

       // Hide system UI
       setFullscreen(true);

       // Set the dream layout
       TextView txtView = new TextView(this);
       setContentView(txtView);
       txtView.setText("Hello DayDream world from TechnoTalkative.com !!");
       txtView.setTextColor(Color.rgb(184, 245, 0));
       txtView.setTextSize(30);

   }
}
Step 3: Declare this MyDreamService service in AndroidManifest file
This step is necessary to make our DayDream available to the system.
    <service
         android:name=".MyDreamService"
         android:exported="true"
         android:label="TechnoTalkative - DayDream" >
         <intent-filter>
            <action android:name="android.service.dreams.DreamService" />
            <category android:name="android.intent.category.DEFAULT" />
         </intent-filter>
     </service>
Step 4: Run this application
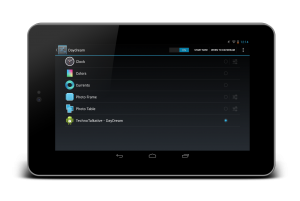
Now, lets run this application, if it executes well then your DayDream will become available inside the Settings->Display->DayDream. Yes as we did nothing for Activity screen we will see nothing in app screen.
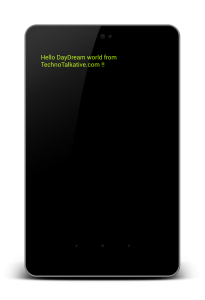
You can see TechnoTalkative – DayDream is available inside DayDream settings. Now select it and press START NOW it would be saying Hello DayDream world from TechnoTalkative.com 🙂
Output:
Download source code of this example: DayDream Example – 1


